Halloween Quick Quilt
The final mini quilt in my seasonal series was for Halloween. Since my boys love Halloween I tend to decorate quite a bit for it, so naturally I needed a quilt for the entry way.

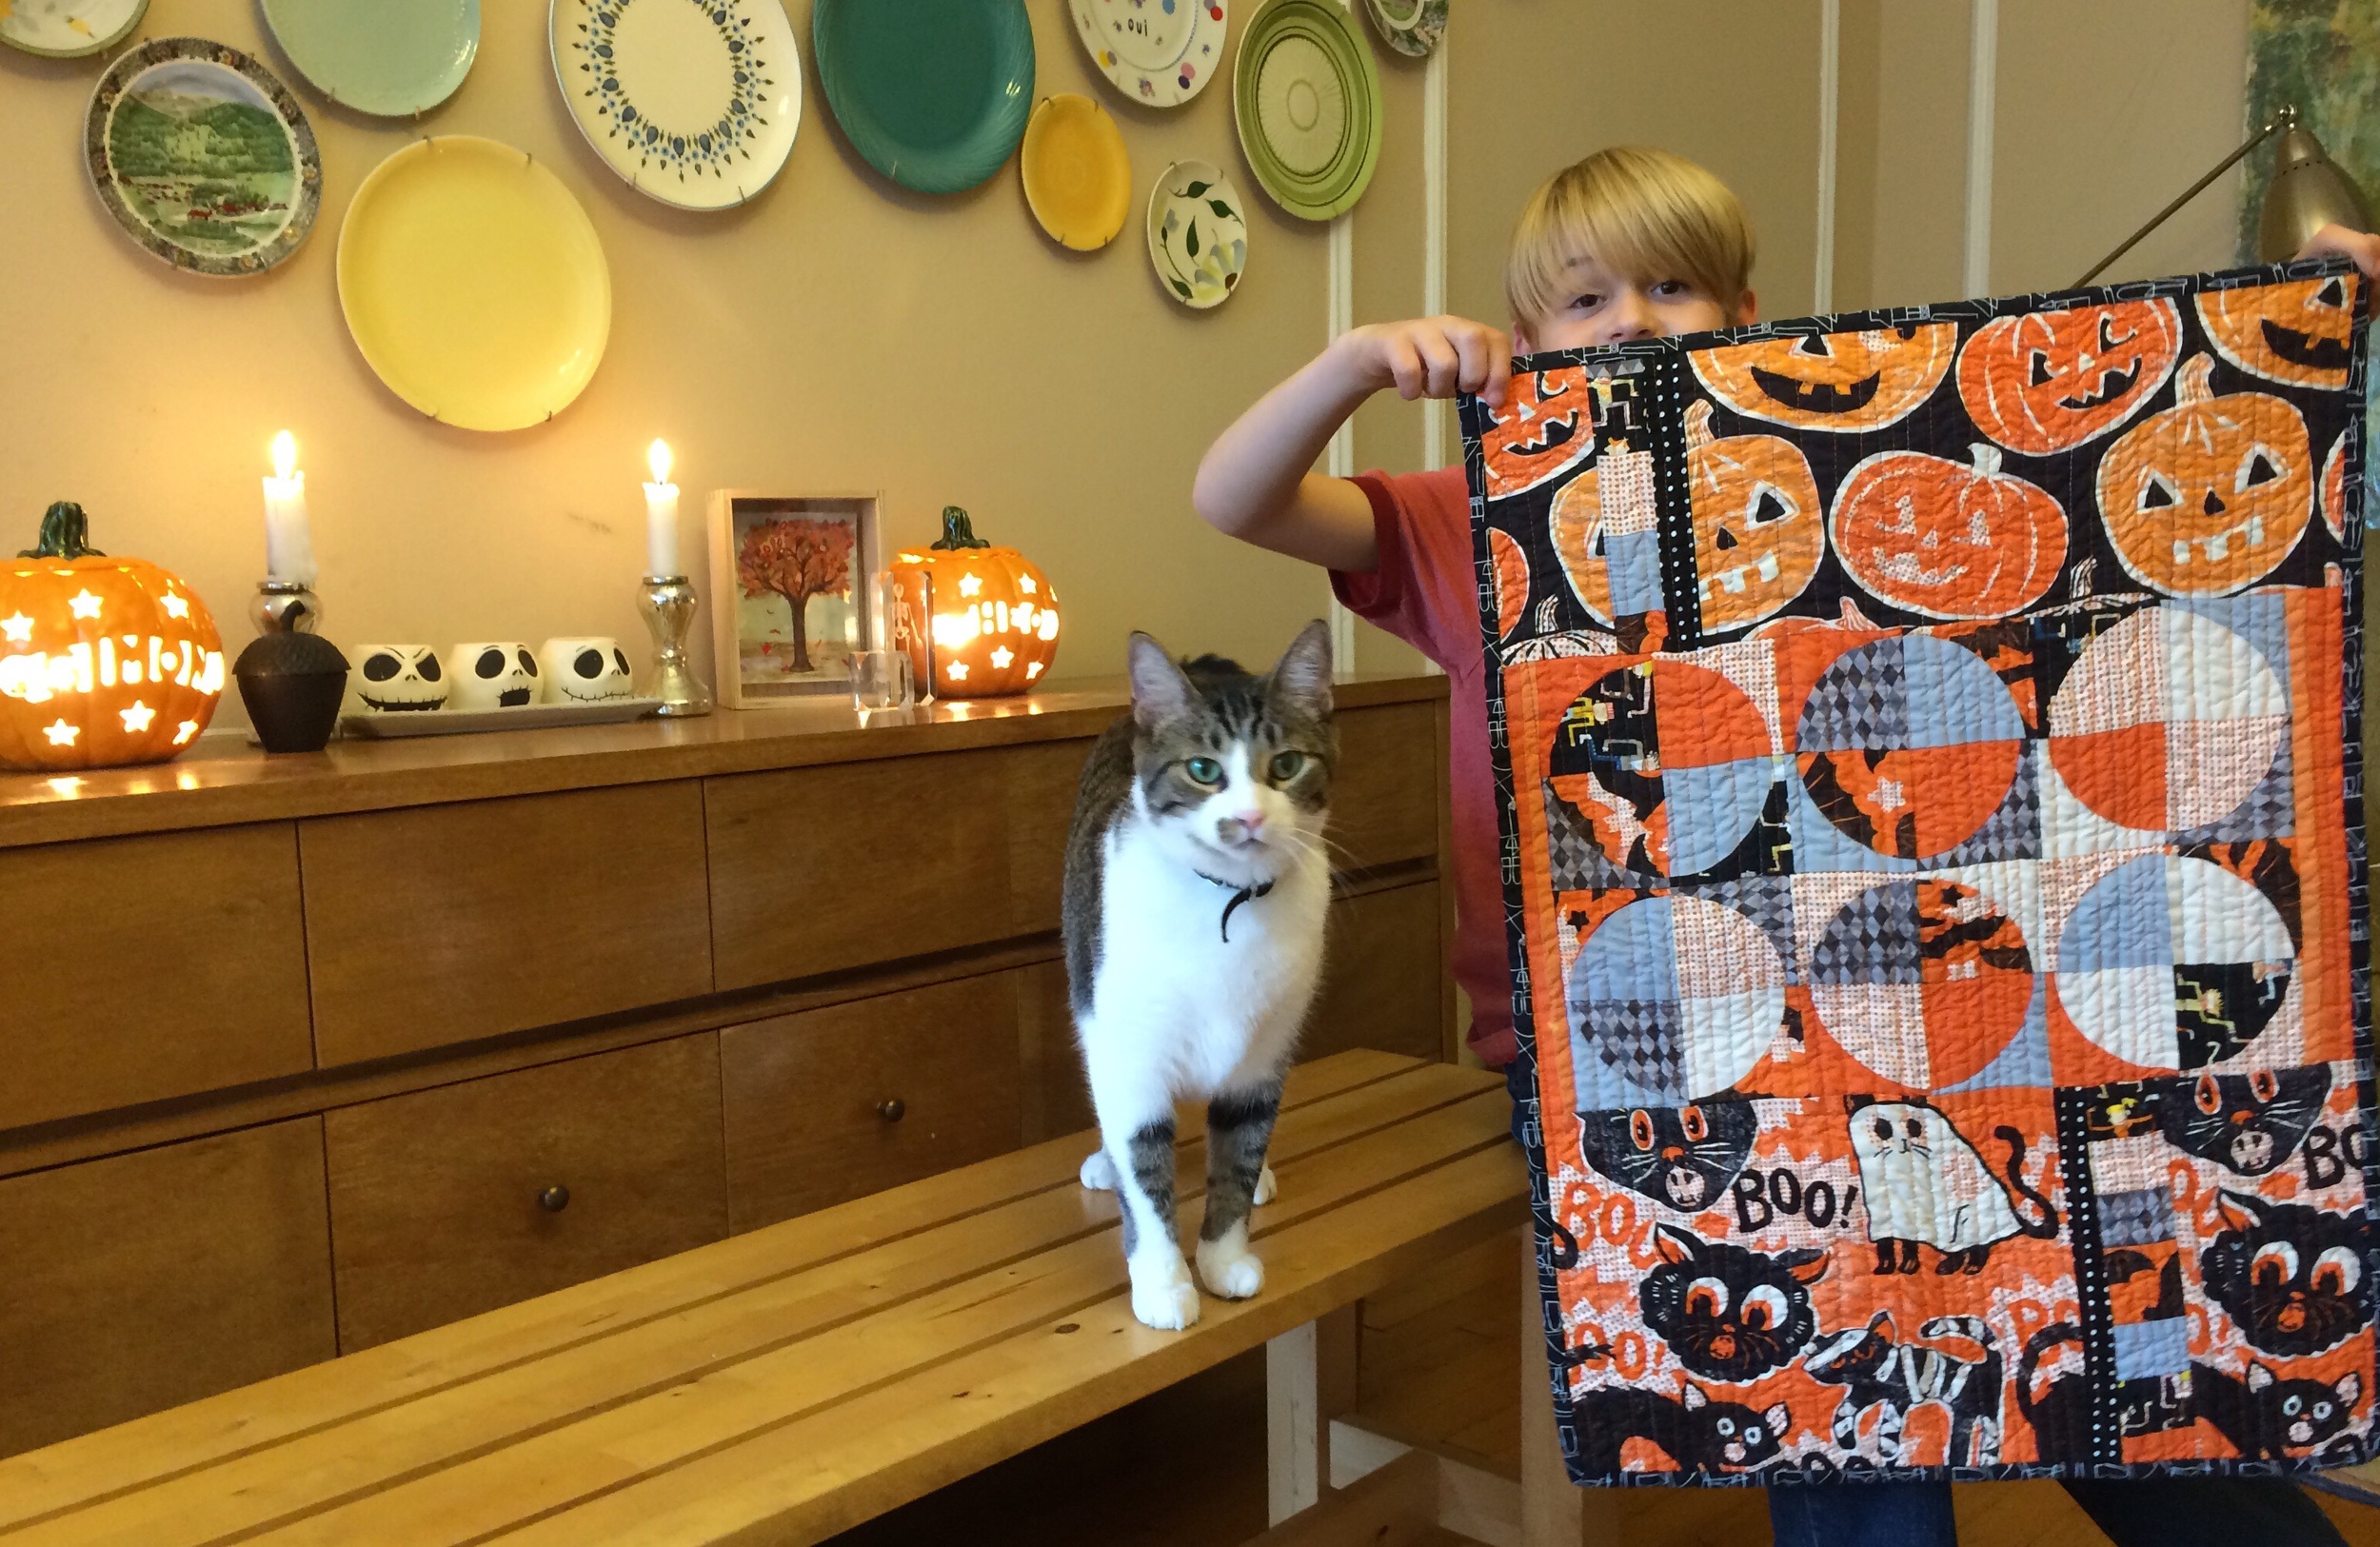
I bought this bundle of fabric featuring the adorable Maude Asbury Halloween prints. I wanted to show off the prints in what little space I had, so I put my two favorites in large swatches on the top and bottom of the quilt, and threw in a little strip of scrappy improv. With the rest I made some little drunkards path blocks and mixed them up into circles until my eyes were pleased. I quilted it with straight lines. Measures 19"x27".
Short and sweet construction, and a cute little Halloween quilt to display every October.

Autumn mini quilt
I will be honest... I'm in love with this little quilt. It's my autumn mini quilt for the entryway.

I knew I wanted to try Kathy's block from Gwen Marston's Liberated Quiltmaking II. I love the quilts she has made using this block, and I love the story behind it. One of her students was trying to make a wonky star block but put the points on the wrong corners of the square. Instead of shrugging her shoulders and telling her to start over, Gwen helped her student see how the block could be used in its own way and create a completely different look. I just love that. Liberated quiltmaking at its best.
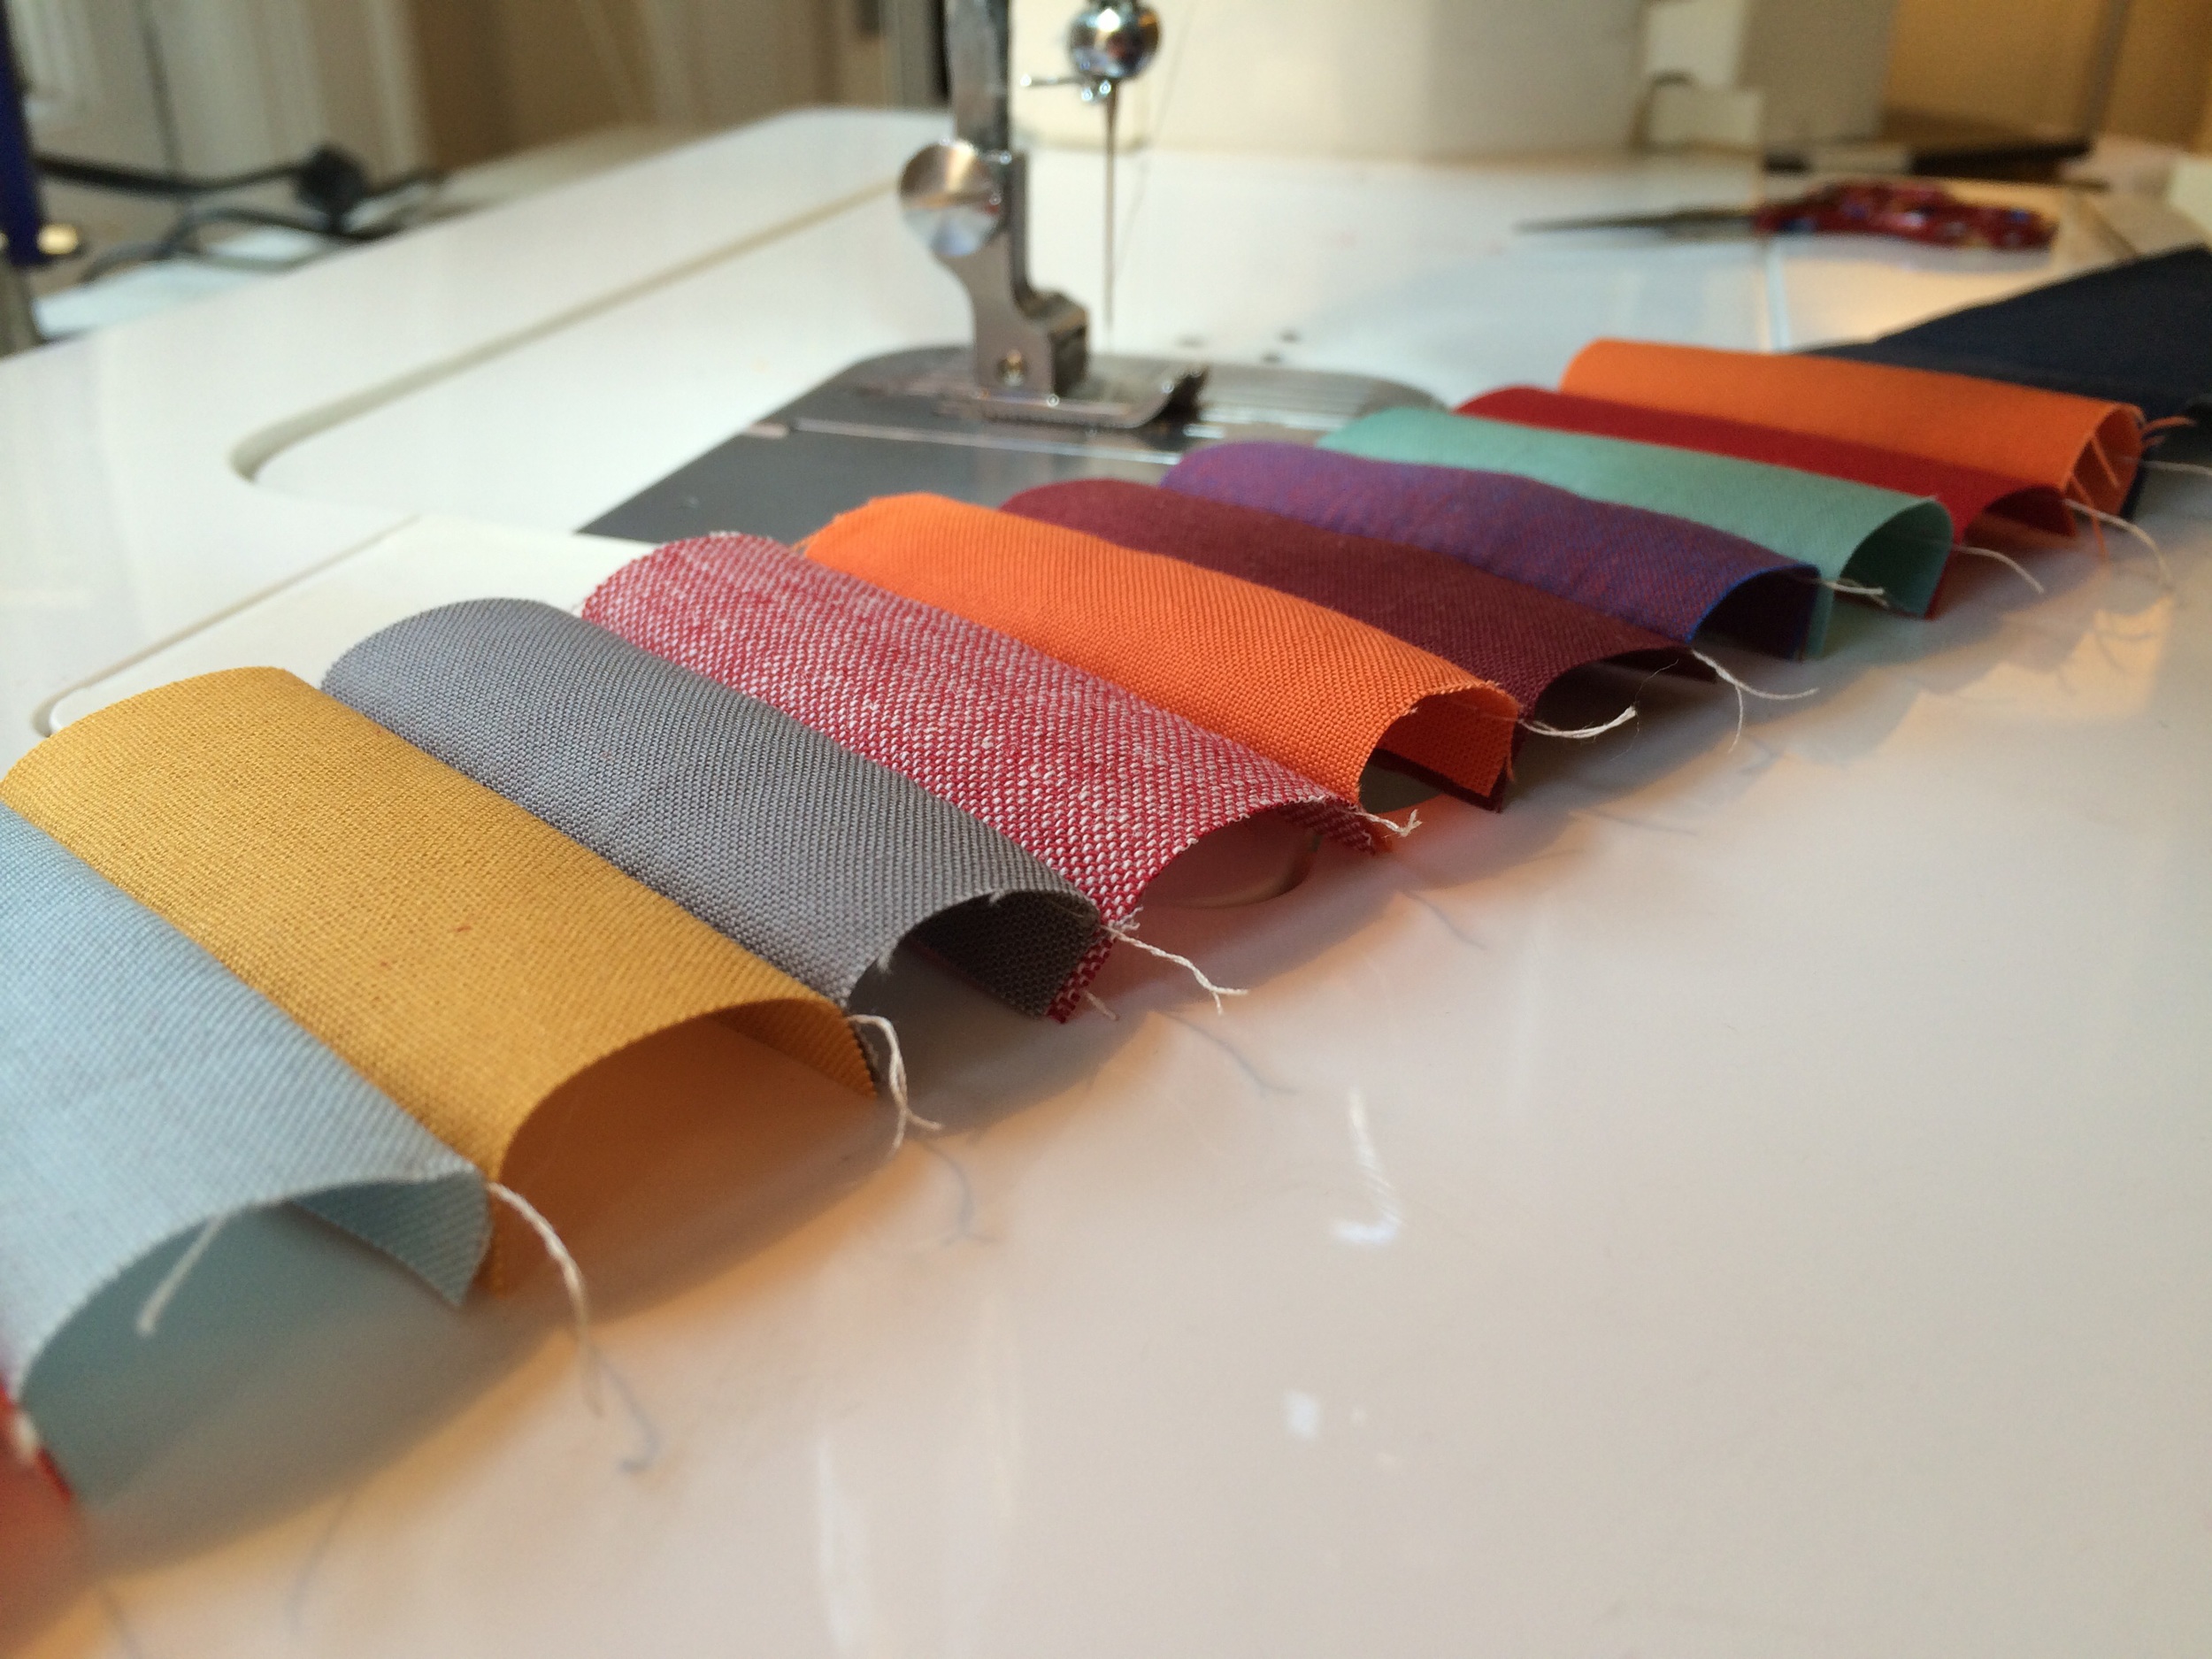
Picking out colors for a fall quilt was tricky for me at first. I tried using what I thought of as traditional fall colors, carefully picking out all my favorites from my Kona card. But when all those reds, yellows, browns, and oranges were together I hated it. It was too on-the-nose and too turkey-looking. It was awful. I couldn't handle it.

I started over and tried a different approach with my colors. I took out some fabrics and added others, namely some greys and violets and teals. Angels sang. I was much happier and ready to proceed with my blocks.
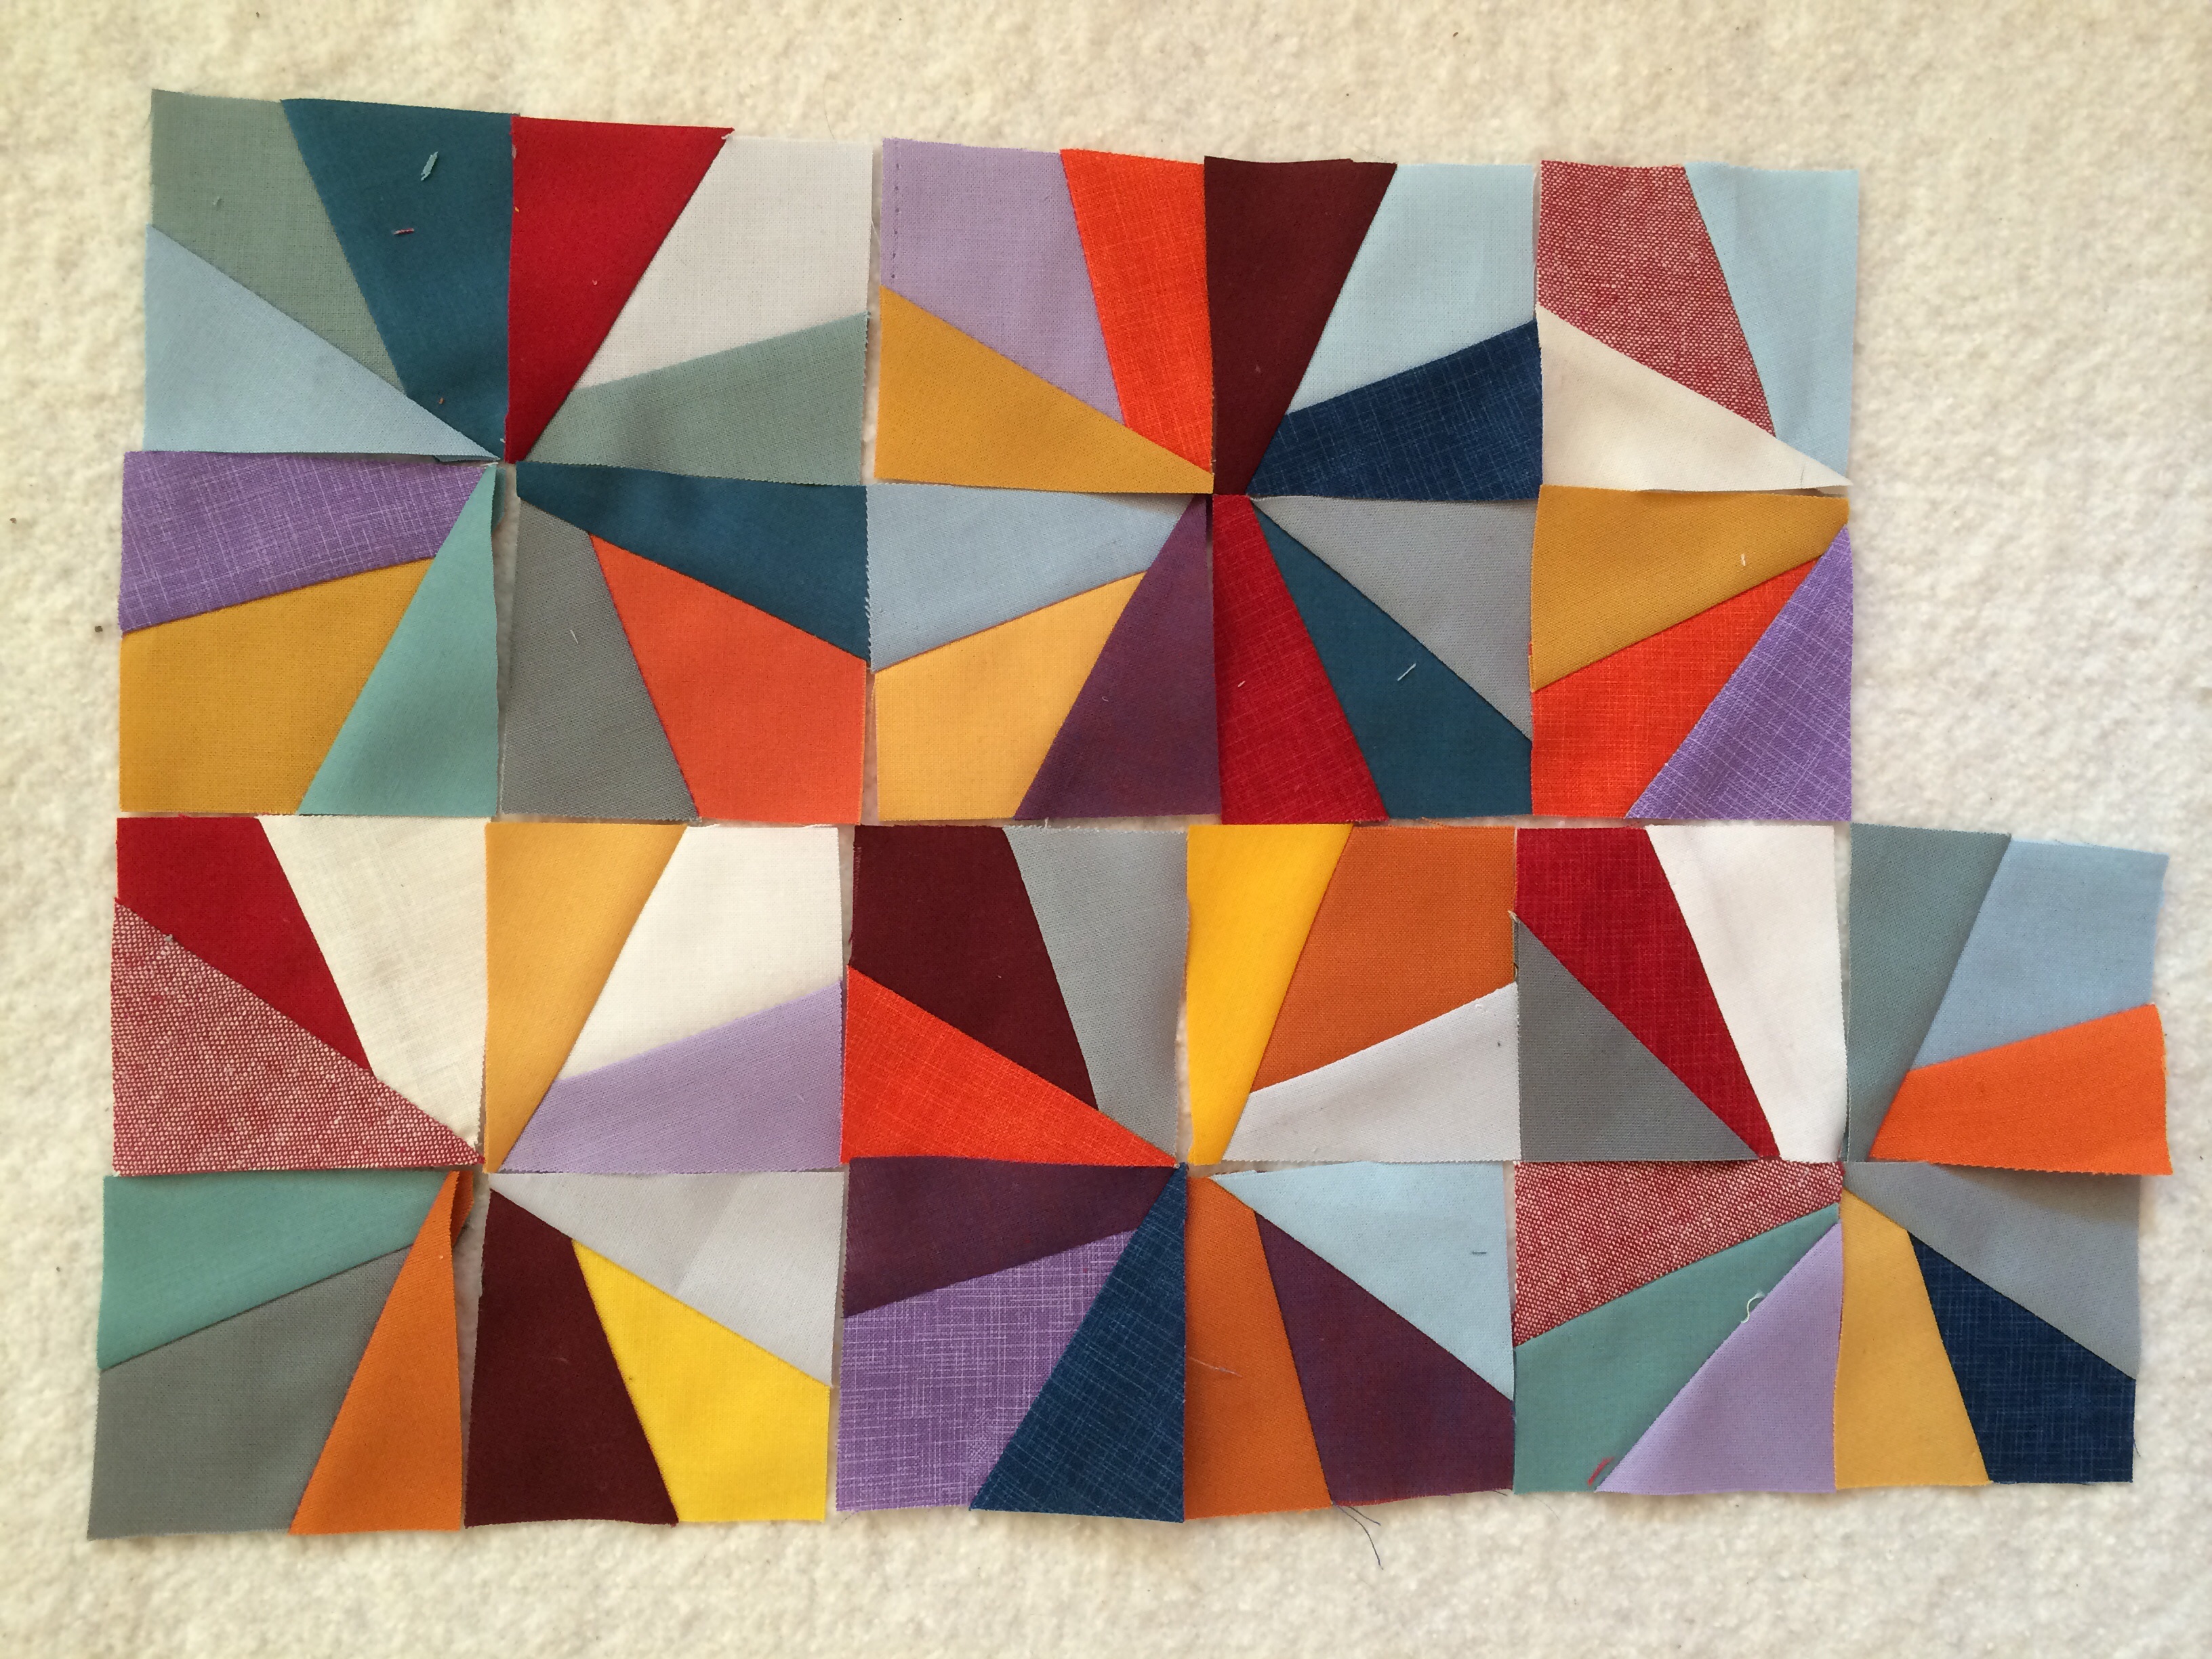

So, Kathy's block in a mix of fall colors. Then I built it out with some solid squares in the same colors. I added some light blue borders, and then used a scrappy binding. The quilting was supposed to look like a leaf, not a teardrop. I'm thinking of adding some handquilting to help clear that up.
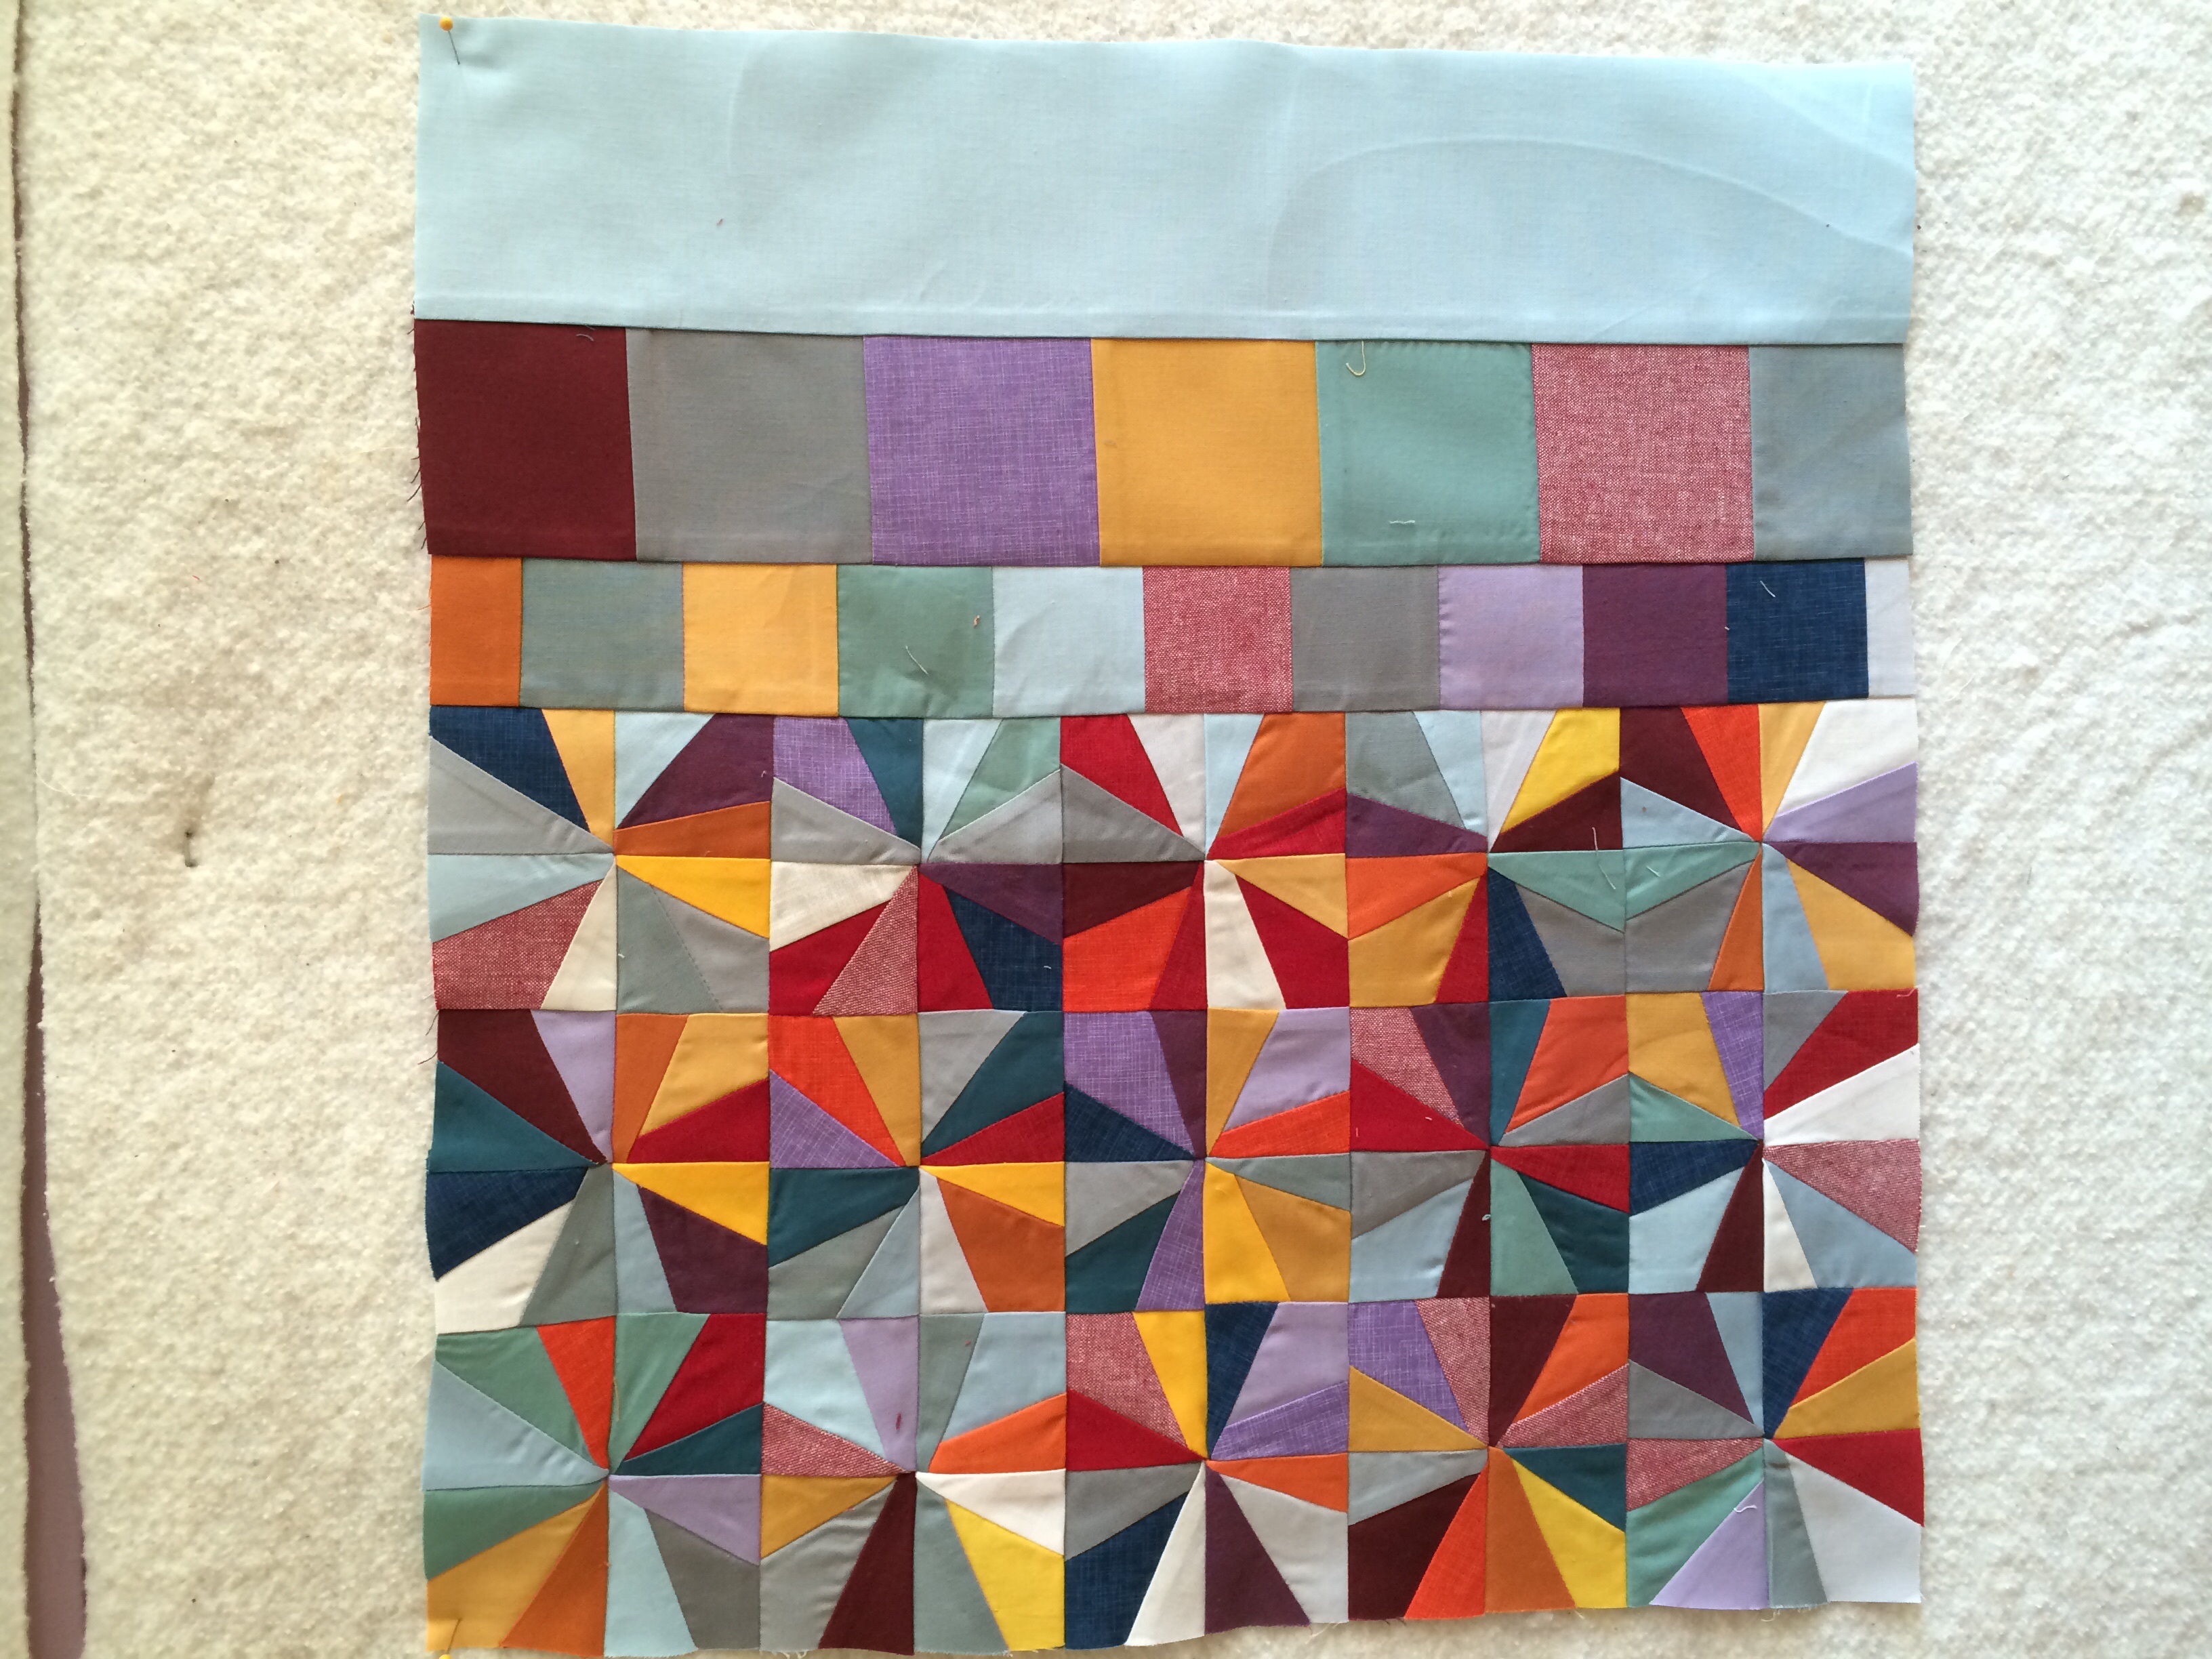


The quilt is up in the hallway, making me smile every time I come home. I think it is my favorite so far.
Round and round improv curves --- summer mini quilt

Continuing with my series of seasonal mini quilts for our hallway, I made this mini quilt using summery colors from my stash and an improv curve technique. Earlier this year I made a quilt using improv techniques I learned from Sherri Lynn Wood. I can't share that quilt here until her book is published (my quilt was not accepted for the book but uses techniques described therein, so she has asked her many testers not to share until after the publication date). It also involved improv curves. For this mini, I used the same idea but extended it to the whole quilt, instead of using blocks.
The basic idea is to start with a square or rectangle, layer another over one of the corners, and cut the two pieces of fabric at the same time, creating a curve instead of a sharp corner. Sew those pieces of curved edged fabric together and iron. Then to the same thing on the next corner and continue around in a clockwise or counterclockwise manner (it doesn't matter which way you go). It's like building a log cabin block, but you are cutting free hand curves instead of using straight strips of fabric. I've included several pictures of my process in order to give you an idea of how I proceeded.


I wasn't sure this idea would work... then I saw this quilt on pinterest and it was very similar to the idea in my mind. It's always so interesting when you think you have imagined something and then you see someone else has already done it! I was happy to see this quilt because it let me know the quilt in my mind would be possible to make. I also think Kati did a great job on hers. I love her color choices.
This was not an easy one. It was really difficult to get the quilt to lay flat as I kept adding on curved sections. In the end I had to add a couple of darts to get it to lay flat (another technique I learned from Sherri Lynn Wood). The darts helped, and after it was washed I blocked the quilt to further help it lay flat.

You can see how wobbly and not-flat this thing was...

Blocking the quilt.
I like the improv curve style of this quilt. However, when I hung it in the hallway, it immediately struck me that it looked like a big piece of tie-dyed cloth. And guess what. I hate tie-dye. And unfortunately, once I saw it, I couldn't unsee it. I think, perhaps, that the colors I chose were responsible for this look of tie-dye. They were too harsh, maybe, too jarring. I should have used some more neutrals and lighter values, perhaps.
I ended up not being very happy with this quilt. I was glad when summer was over and I could take it down and put up something else. Maybe I will try my hand at another summer mini before next year. I will have to put some thought into what makes a good summery color palette.
Even though it wasn't my favorite, it was a good learning experience, as always. Onward.